
For 2D modeling components, or when using work planes in 3D models, you may have noticed a subtle yet significant change in how geometry can be created in the software. Using Sketch mode, along with constraints and dimensions, you can draw plane geometry and define relations between the geometric entities that you draw. Rest assured, the 2D geometry drawing functionality you have grown accustomed to is still available, but now there are features that enable efficiency like never before.
Introducing Sketch Mode
Announced with the release of version 5.5 of the COMSOL Multiphysics® software, Sketch mode enables you to interactively draw and edit geometry right within the Graphics window. The functionality can be used with planar drawings and is available with the core functionality of the COMSOL® software.

The Sketch tab, available under the Geometry or Work Plane ribbon tabs for 2D or 3D model components, respectively.
With Sketch mode, you can interactively draw a plethora of different types of shapes. How these shapes are drawn is identical to previous versions of the software, but with enhanced visualization, indicators, and functionality.
After opening the Sketch toolbar and selecting the type of shape you want to make in the Draw section of the toolbar, you can click and move or drag the mouse in the Graphics window to form the shape.
A rectangle drawn first using the respective shape’s primitive feature, the Rectangle button, and then the Polygon button. Using the Rectangle button, the object is drawn by left-clicking, dragging the mouse to the desired size, and then left-clicking again to complete the drawing. Using the Polygon button, the object is drawn through forming line segments for each edge. Upon finishing drawing the last edge, right-clicking completes the drawing.
The new Sketch mode provides interactive and faster drawing options for shapes available in previous versions of the COMSOL® software, such as:
- Interpolation curves
- Bézier curves
- Rectangles
- Squares
- Circles
- Arcs
- Ellipses
There is also new functionality that provides drawing options for geometric shapes and features that were not available to be drawn previously, like polygons, all of which maximize the efficiency with which you can compose the geometry you need.
Fillets can now be sketched interactively by selecting one or more points and then dragging the mouse to create the rounded corners.
Demonstration of the Fillet operation being used. Vertices at sharp corners are selected and then dragged to form the rounded corners.
The Composite Curve feature enables you to interactively put different types of edges together into a single object while maintaining a connection between all of the constituent edges.
A composite curve is shown being drawn, first automatically and then manually. When manually assembling objects into a composite curve, you may need to update the setting for the object type first in order to have the menu option available.
When editing any objects in the geometry, apart from changing any values in the Settings window for an object, you can now also click and drag the object itself, its edges, or a vertex to resize it or change the position of one or more parts of your geometry.
For some geometric primitive features, such as polygons or interpolation curves, when editing the point coordinates, a red circle identifies the corresponding point in the Graphics window that you are currently editing, enabling you to see exactly which point you are moving.
In the Settings window for a polygon, selecting any of the cells in the table will result in the corresponding vertex with those coordinates being highlighted with a red circle.
Constraints and Dimensions in the Design Module
Available as part of the Sketch ribbon tab, there are tools that enable you to apply constraints and dimensions to planar geometry, which can also be done interactively right within the Graphics window. This is useful and especially significant when you are drawing or dealing with complex geometries and use cases, for example, if you wanted to parameterize your geometry and subsequently change the values. Instead of needing to come up with and then manually define expressions for the coordinates and dimensions of primitives, you can specify positions, distances, and angles — making the process a lot faster and easier. Note that this functionality is accessible with the Design Module and is not part of the core functionality of the COMSOL® software.

The Constraint and Dimension sections of the Sketch tab, available with the Design Module.
Enabling the use of these tools is done through the Geometry node by turning on the respective setting in the Constraint and Dimension section of the Settings window.
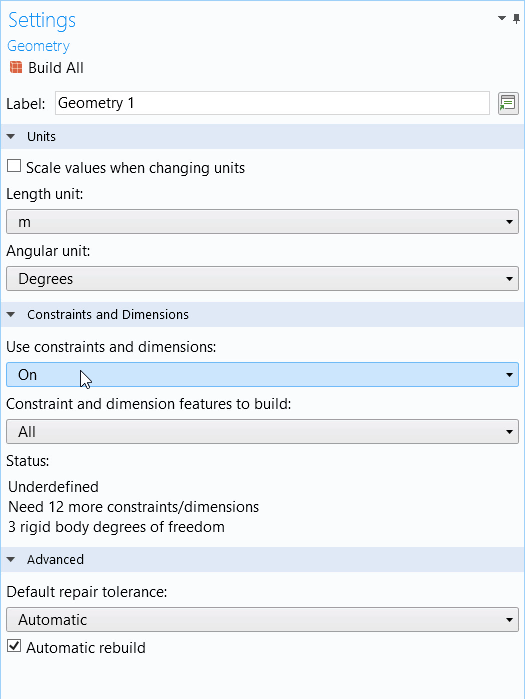
The Geometry Settings window, wherein the constraints and dimensions functionality has been enabled by selecting On from the respective drop-down menu.
A constraint is a requirement placed on geometric entities that is not associated with a value. Examples of this include requiring that two edges be perpendicular to each other or that a line be tangent to a curve. The software has many predefined constraints available for use, such as:
- Parallel
- Perpendicular
- Tangent
- Coincident
- Concentric
- Equal Distance
- Equal Radius
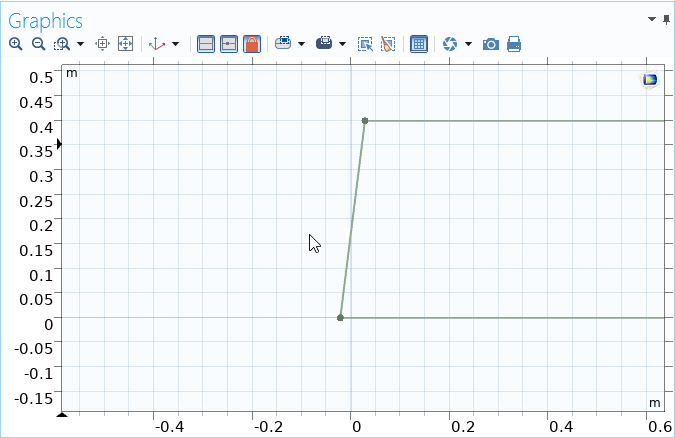
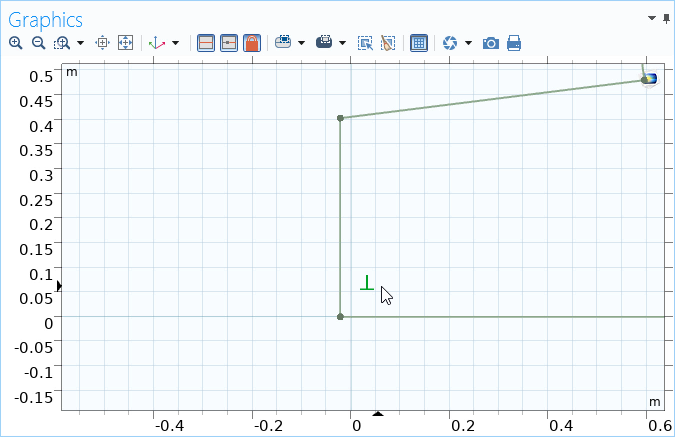
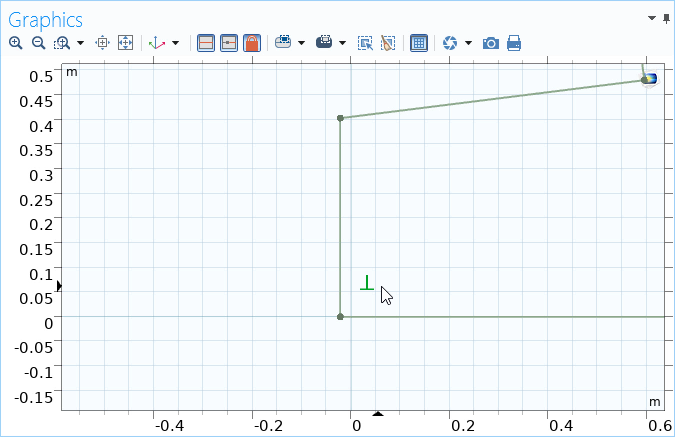
A region of a simple geometry showing before (left) and after (right) a Perpendicular constraint has been applied between two adjacent edges.
Conversely, a dimension is a requirement placed on geometric entities that is associated with a value. Examples of this include setting the value for the radius of an arc or the distance between two points. Parameters and expressions can also be used to define such values, which is useful when running a parametric sweep or parameter optimization (more on this later). Dimensions that are built into the COMSOL® software include:
- Distance
- x-Distance
- y-Distance
- Total Edge Length
- Angle
- Radius
- Position
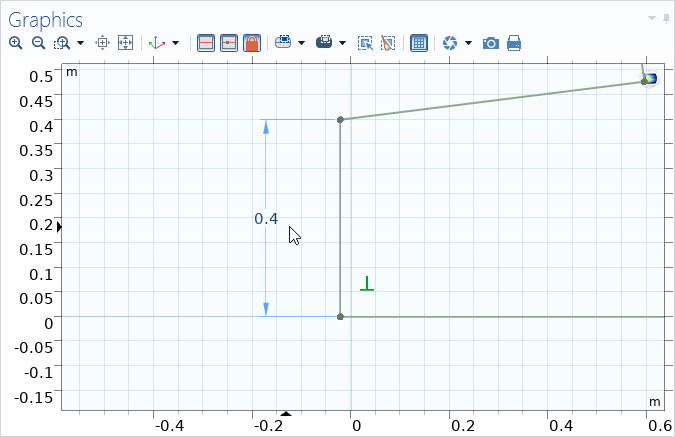
A region of a simple geometry showing before (left) and after (right) a Distance dimension has been applied to an edge.
The Constraint and Dimension features can be applied a few different ways. They can be added manually by selecting the desired Constraint or Dimension button in the ribbon and then selecting the appropriate geometric entities in the Graphics window to which you want to apply the relation. It can also be done with a more automated approach by enabling the Smart Constraint mode or Smart Dimension mode. With this approach, you select the Constraints button or Dimensions button in the Sketch toolbar; start selecting geometry; and then, based on the geometric entities you select, the appropriate constraint or dimension appears with its respective icon next to your mouse and is then available for you to apply.
Additionally, constraints can also be added automatically while a sketch is edited interactively if the Use constraints and dimensions setting is turned on. For instance, dragging a vertex to coincide with another vertex in your sketch would result in a coincident constraint being automatically generated.
Once your sketch is well defined, the geometry is locked and appears in black as opposed to the gray color it displays when it is unlocked and editable. Additionally, a status message displays in the Geometry node’s Settings window, stating that the sketch is well defined. Note that applying constraints and dimensions to create a well-defined sketch is completely optional, but is recommended for geometric parameter sweeps and optimization.
The Smart Constraint mode is enabled to apply constraints to this arbitrary geometry. Note the status message for the geometry at the beginning of the video. Following this, Smart Dimension mode is enabled to apply dimensions to the geometry. Note the status message for the geometry upon applying all of these constraints and dimensions at the end of the video.
After applying any constraints or dimensions to a geometry, you can always hover with your mouse over any of the representative icons. This will highlight the geometric entities associated with the constraint or dimension in the Graphics window. You can also double-click the icon and the respective node in the geometry sequence will automatically be selected. From there, you can choose to edit any properties of the constraint or dimension in the Settings window.
Upon hovering with the mouse over any constraints and dimensions applied to your geometry, the associated geometric entities are highlighted in the Graphics window. You can then double-click any constraint/dimension to open and edit its properties in the Settings window.
Preparing Your Sketch for a Parametric Sweep
Having discussed this geometry functionality in detail, you may be wondering at what points in your design process to implement the use of such features, particularly if you want to study the influence of geometric parameters using a parametric sweep. For such an application, it is advisable to apply constraints and dimensions to the sketch you have drawn so that it is well defined. Doing so ensures that the geometry you sketch behaves in a predictable way when the dimensions are changed. As dimensions and coordinates update according to the values you specify in the sweep, the shape and the relation of geometric entities to each other is maintained.
There is no specific procedure that needs to be employed to bring a sketch not sufficiently constrained and defined to one that is. However, we have found the following order of steps to be useful when drawing and uniquely defining a sketch to be used in a parametric study through the use of the Sketch toolbar:
- Sketch the geometry
- Apply constraints
- Apply dimensions
- Apply constraints and dimensions to lock the rigid body degrees of freedom
In the steps outlined above, you can see that applying constraints and dimensions is actually split into two parts: one in which you define and constrain the geometric entities within your sketch, and another in which you define and constrain the geometry specifically with respect to avoiding rigid body translation and rotation. Following this order is generally efficient in obtaining a well-defined sketch. In this way, the geometry itself is constrained first. Then, the last constraints and dimensions needed to result in a well-defined geometry are those that eliminate the sketch from being able to be moved freely as a rigid body. Dimensions such as Position, x-Distance, or y-Distance can be used to constrain rigid body degrees of freedom.
Next Steps and Further Learning
After learning about this geometry functionality in the software, we encourage you to try it out! Experiment with combining different shapes and employing the recommended sketching workflow mentioned above to become familiar with these invaluable tools. If you are interested in learning more about the geometry functionality in COMSOL Multiphysics®, we recommend checking out our Learning Center course on building geometry using the base package of the software.
To learn more about the Sketch toolbar as well as the Constraint and Dimension features, you can refer to the COMSOL Multiphysics® version 5.5 Release Highlight pages for Geometry and the Design Module, respectively. In addition, for those users with licensing for the Design Module, there is a tutorial on using the Sketch tool along with constraints and dimensions in the Introduction to the Design Module documentation.
Editor’s note: This blog post was revised on December 5, 2023, to include discussion of the Building Geometry Using COMSOL Multiphysics® course in the Learning Center.


Comments (0)