Surface micromachining is a process used to manufacture MEMS devices, which includes accelerometers. In this blog post, we model the electric field and forces within an accelerometer as well as highlight a new geometry feature available in COMSOL Multiphysics version 5.0.
An Introduction to Surface Micromachining
Among MEMS manufacturing technologies, surface micromachining is recognized for its ability to merge electronic components and freely moving mechanical parts on the one substrate. The fabrication process begins with the deposition of thin films on top of a silicon substrate. These varying structural layers are then selectively etched to free the moving parts and create the desired structure.
Featuring a low cost and the capability for high-volume production, this form of micromachining has found several application areas within MEMS device manufacture. One example is the surface micromachined accelerometer. This type of accelerometer is particularly noted for its important use in triggering airbags in automobiles.
Now that we’ve acquired some background info on the manufacturing process, let’s dive into the modeling of this device.
The Building Blocks of the Surface Micromachined Accelerometer Model
The Surface Micromachined Accelerometer model is based on a case study from the book Microsystem Design by Stephen D. Senturia. Using polysilicon as the building material, this model consists of a released proof mass that is supported by anchored springs at both ends, along with sensing and self-test electrodes that extend to the sides of the device.
The geometric building blocks — the proof mass with attached electrodes, the folded spring, and the fixed electrode array — are implemented as Subsequences in the geometry building process in COMSOL Multiphysics, such that the building blocks can be stored in a source model file. By linking to the Subsequences in the source model file, these same geometric building blocks can be re-used in alternate model files. This is enabled by the Linked Subsequences geometry feature, which was first introduced in COMSOL Multiphysics version 5.0.
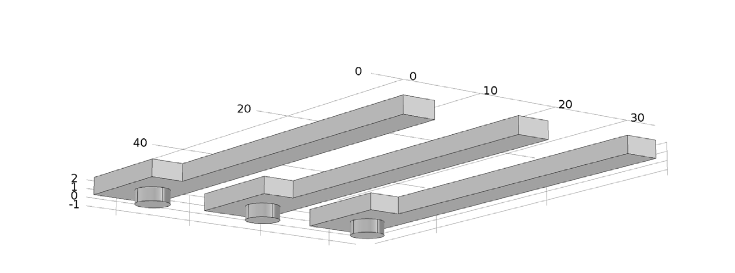
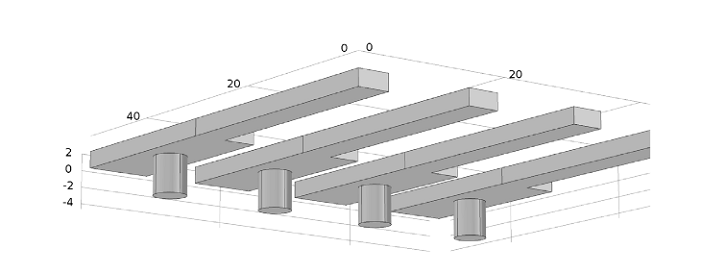
Subsequences can take on a number of arguments, which result in varying dimensions, orientations, positions, and numbers of features. In the example below, the two electrode arrays are composed with the same Subsequence but have different sets of arguments. This affects the number of electrodes, the dimensions, and how the anchor pads are oriented within each array.


Electrode arrays built from the same Subsequence but featuring varying sets of arguments. This results in different dimensions, anchor pad orientations, and numbers of electrodes.
When acceleration is applied to the device — in this case, by using the Body Load domain feature — the restoring force from the springs causes a displacement in the proof mass that is proportional to the acceleration. This displacement in turn affects the capacitance between the fixed and moving electrodes, a change that can be measured with various standard circuits.
With the Electromechanics interface, we can model the electric field within the deforming gaps between the electrodes. This physics interface also allows us to apply the self-test electrostatic forces to the solids, which produces a corresponding deformation within the structure.
The Modeling Results
First Study
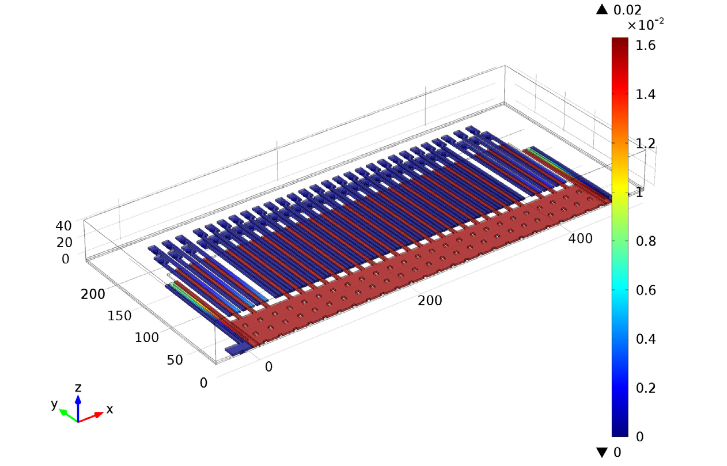
Our initial study begins with analyzing the displacement in polysilicon domains of the model after an applied acceleration of 50 g. A movement of around 0.07 micrometers is observed in the proof mass, including the attached moving electrodes. While very little movement is seen in the anchored spring bases and the fixed electrodes, varying displacement is noted along the length of the folded springs, as predicted.
![]()
Displacement resulting from an applied acceleration of 50 g.
Additionally, this study highlights the linear relationship between the applied acceleration and the displacement. The measurement of the displacement is derived from the capacitive coupling between the moving and fixed sense electrodes.
In a real device, an alternating square-wave voltage is applied to the fixed sense electrodes. When the applied acceleration causes the proof mass to move, an alternating voltage that is proportional to the displacement is induced as a result of this capacitive coupling between the moving and fixed electrodes. This set-up enables easier signal processing in the attached circuitry. In our simplified model, only one half of the square wave is modeled as a stationary problem to save computation time without losing generality.
Second Study
We then turn our attention to the accelerometer’s self-test electrodes. Here, we analyze the displacement that occurs in the polysilicon domains when 0 volt is applied to the fixed electrodes to the left of the moving electrodes that are attached to the proof mass. A bias of 2 volts is applied to those on the right-hand side. The results show a movement in the proof mass of around 0.02 micrometers, a magnitude that is big enough for the self-test purpose.

Displacement following self-test voltage.
When comparing the displacement between applying the self-test bias to the set of fixed electrodes on the left-hand side of the moving electrodes versus the one on the right-hand side, the values of the displacement are found to have the same size with opposite signs. This result shows agreement with the prediction from symmetry.
Summary
In this blog post, we have shown you how to model a surface micromachined accelerometer and visualize displacement within the device in response to electric forces. Additionally, we have demonstrated the use of the new Linked Subsequences geometry feature, emphasizing its role in making the geometry building process more efficient.
Try It Yourself
- Download the Surface Micromachined Accelerometer model


Comments (0)