
Sound isolation is an important part of a building’s quality. Hearing neighbors’ activities due to “paper-thin” walls is a common complaint of apartment and dormitory dwellers, and residents living near highways or airports do not want to hear the regular sounds of car or air traffic. Therefore, when constructing buildings, computing the sound transmission loss through the building components is an important task.
What Is Sound Transmission Loss?
The sound transmission loss (STL) through a building component is the logarithmic ratio between the total incident power on the structure (Pin) relative to the total transmitted power (Ptr):
There are several standards for STL measurements and methods devised in order to directly or indirectly measure the incident and transmitted power. Typically, a so-called two-room method is used. This method has two common configurations:
- A reverberation room on the source side and the receiver side (reverberant-reverberant)
- A reverberation room on the source side and an anechoic room on the receiver side (reverberant-anechoic)
One of the challenges met in these setups is that the room obviously influences the acoustic field. At low frequencies, below the Schroeder frequency, the modal behavior of the room is important, thus making it impossible to generate a diffuse field. Achieving a perfect diffuse field is difficult, so measurements are often repeated with several changes in the setup, and the results are then averaged.
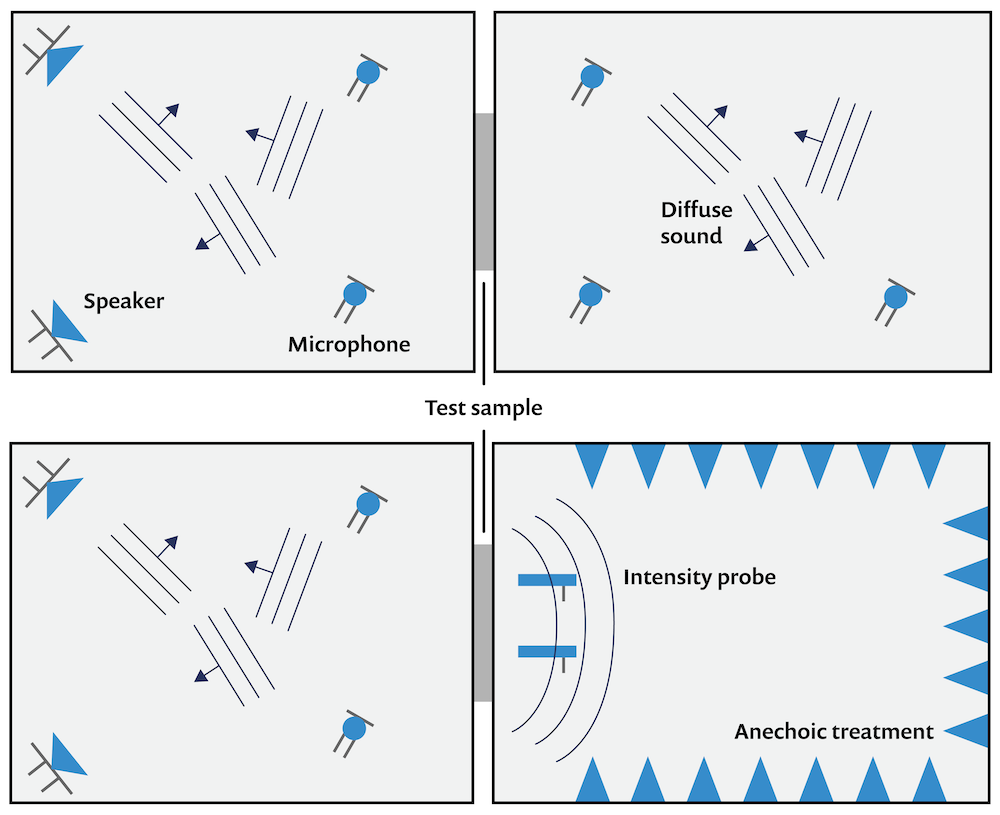
Diagram of both two-room method configurations.
Setting Up a Computationally Efficient Model
Modeling both the source and receiver rooms in an STL simulation is extremely computationally expensive. Instead, the model discussed here makes certain assumptions. First of all, the source side of the test sample (a concrete wall) includes an ideal diffuse field, and the receiver side includes an ideal anechoic termination. From the approach used in the model, you can extract an ideal, experiment-independent STL. Second, it is assumed that the test sample has little influence on the sound field on the source side. This is true for relatively stiff structures with low acoustic absorption properties anyway, and in general for structures that have a high STL (in this model, it is above 40 dB).
The model setup, depicted below, consists of an ideal diffuse field on the source side and the anechoic termination on the receiver side. On the source side, the field (and its reflections) is not modeled but simply applied as a load on the structure. The diffuse field is defined as a sum of plane waves with random direction and random phase (100 are used here), plus the corresponding reflected waves. The model needs to capture the pressure buildup on the wall due to the reflections. Different random seeds are used for all random functions. On the receiver side, an air domain truncated with perfectly matched layers (PMLs) is used as the anechoic termination. The statistical nature of a diffuse field indicates that the model should be run several times with varying random seeds. This is especially important at higher frequencies. This last step is an extension of the current model, left to the modeler. However, this step is shown in the model Sound Transmission Loss through a Window. The results after running the concrete wall model with the extra step, using several random seeds, is shown below in the results.
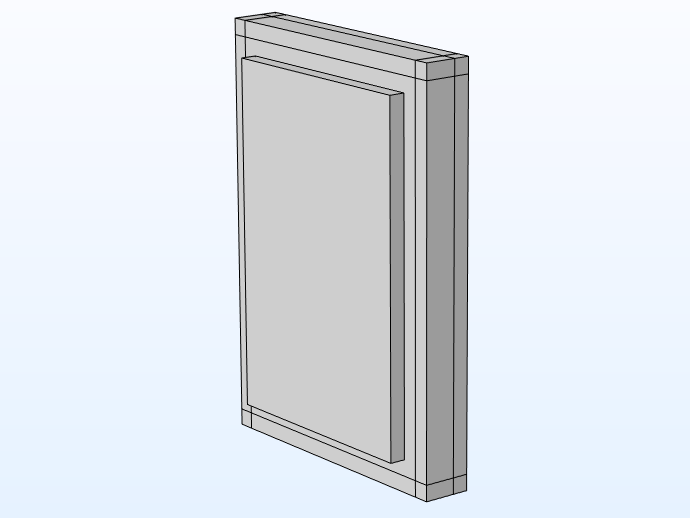
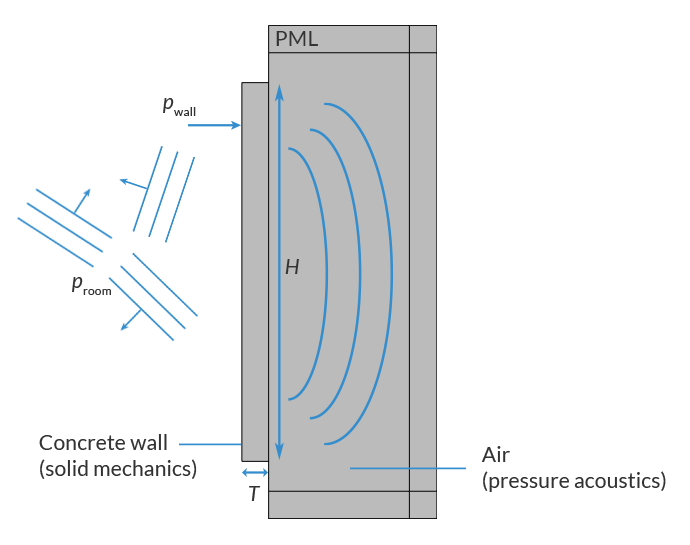
Left: 3D model geometry. Right: Model setup (xy view), with a random sound field on the source side shown to the left and anechoic termination on the receiver side to the right.
Results for the STL Simulation
The sound transmission loss (STL) through the concrete wall is depicted as a function of frequency in the image below. In the plot, the blue curve is the result of the simulation (with one given diffuse field setup). The blue curve results from the deterministic approach used (sum of the finite number of waves) to model the diffuse field. A small change in the diffuse field is likely to change the results (blue curve), as in a physical test. The green bars represent the octave-band-averaged values. The red curve represents typical measurement results for a similar structure.
The blue simulated curve shows typical characteristics of STL predictions. The two dips between 100 Hz and 200 Hz represent the first two mechanical modes of the structure (f11 = 113 Hz and f12 = 170 Hz). At these frequencies, the STL is low and sound insulation is poor. Below the mechanical resonances, the STL is stiffness controlled and depends a lot on the boundary conditions applied to the test structure. Above the resonances, the curve follows the so-called mass law with a 6 dB per octave increase in the STL.
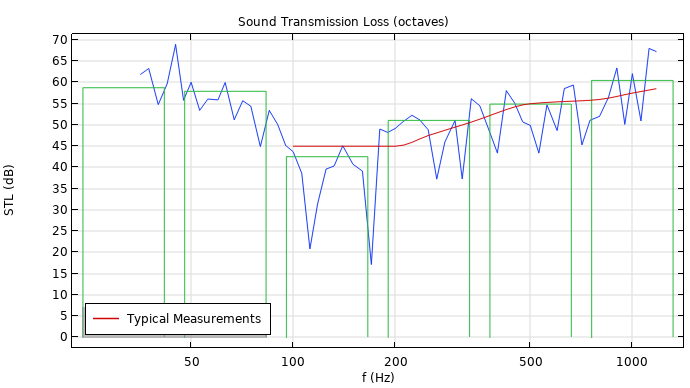
Computed STL (blue), octave and averaged (green), and typical measurement data (red).
In the next image, the tutorial model has been run with 15 random seeds for the diffuse field (the dotted curves). The average of the 15 runs is shown in blue, and the red curve again shows typical measurement results. The results shown here represent an extension of the existing tutorial model, as discussed above. This curve will be closer to measurement results.
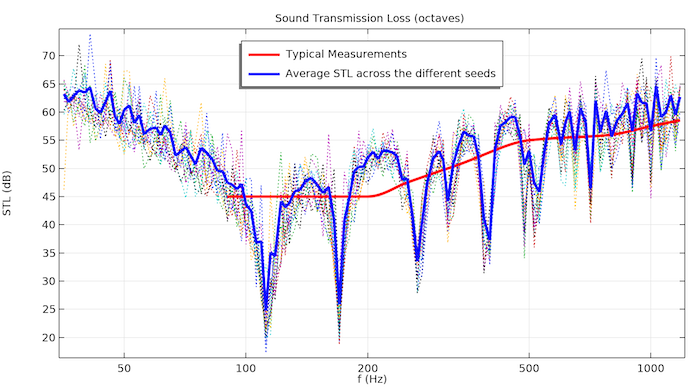
The image shows the results of running a finer frequency sweep with 15 different combinations of random loads. The large dips where the modes are present show a consistent value of STL across the different load cases, while other frequencies show some dispersion.
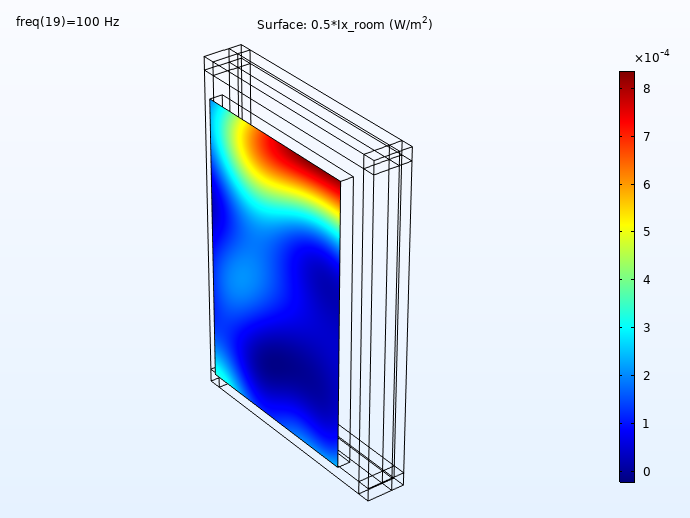
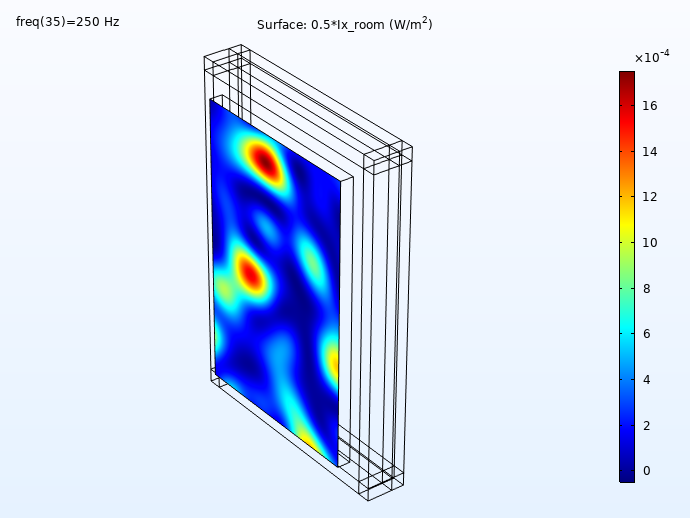
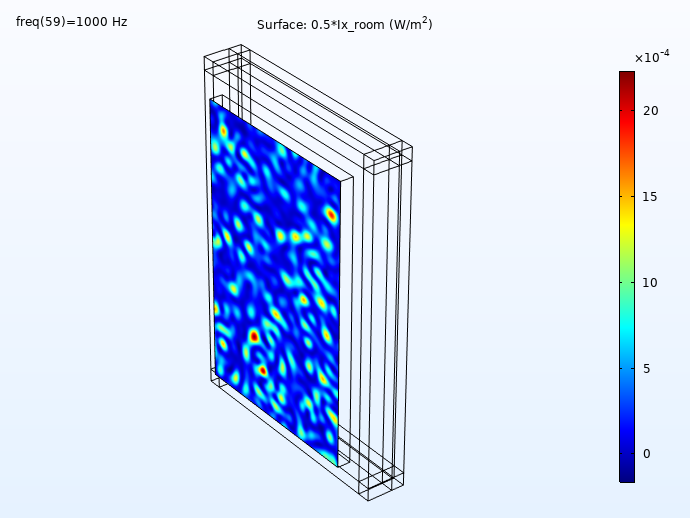
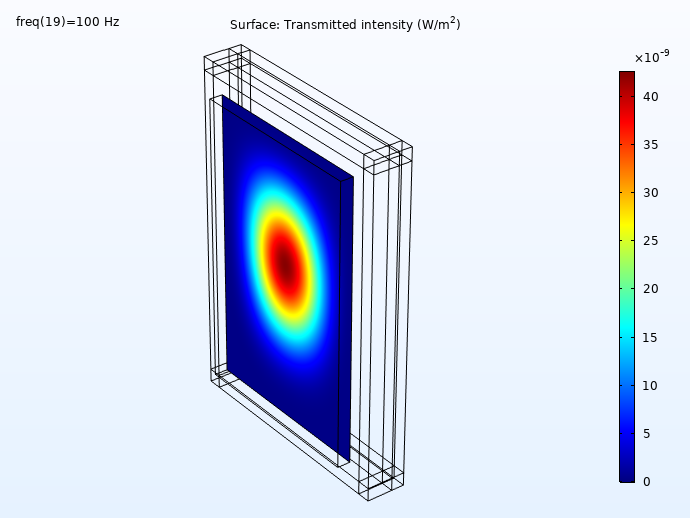
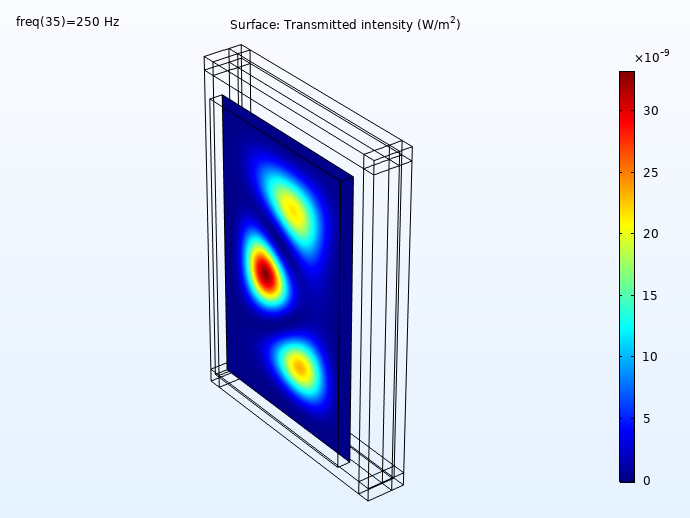
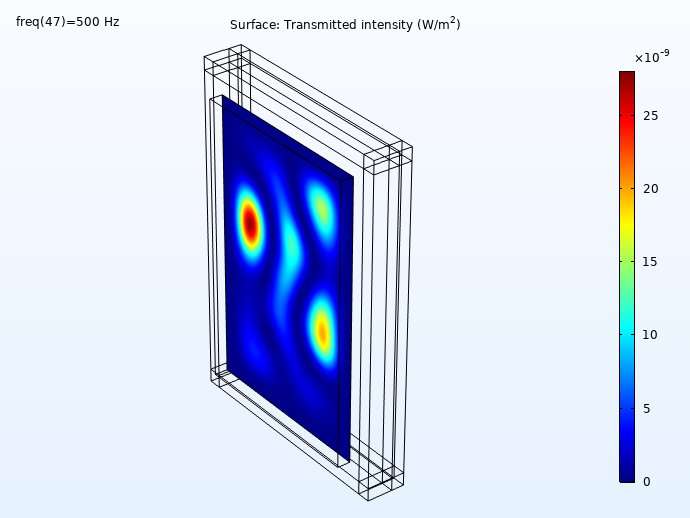
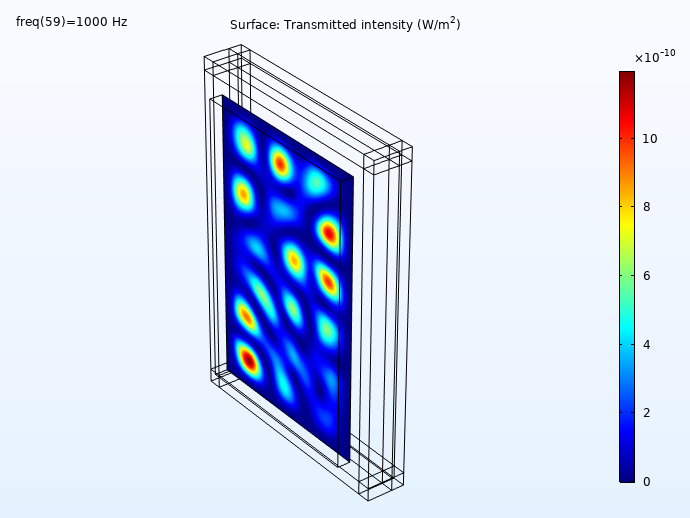
Some results showing the incident and transmitted intensities (distribution on the wall surface) for 100 Hz, 250 Hz, 500 Hz, and 1000 Hz is shown below. First, the incident intensity distribution.
The incident intensity evaluated in the concrete wall surface.
Here, we can see the transmitted intensity:
The transmitted intensity evaluated on the concrete wall surface.
Next Steps
Try the model discussed in this blog post by clicking the button below, which will take you to the Application Gallery.
Further Resources
- Learn more about modeling room acoustics on the COMSOL Blog:
- Check out these related tutorials:





Comments (6)
Noah Davis
December 15, 2020Hi Mads
Thanks for sharing this! I have two questions about this example.
Firstly, I am wondering if we could use BEM to model the receiving side. Would it be easier to solve? After I downloaded the model file, I doubt why the range of a polar angle (theta) was set to pi in the random function. Would be it be pi/2?
Thanks.
Noah
Mads Herring Jensen
December 16, 2020 COMSOL EmployeeHi Noah
I think that if you look at the model in COMSOL 5.6 we have changed some definitions and theta runs from 0 to pi/2 (well actually we let cos(theta) run from 0 to 1). I cannot remember how it was in 5.5. With regards to using BEM this is possible in 5.6, but it is not possible in earlier versions of COMSOL. You need to use a new boundary feature called “Exclude Boundaries” to set up this type of half space BEM problems. An example of that is shown in the tonpilz_transducer_prestressed tutorial model.
Best regards
Mads
Raja Kumar
June 27, 2023Which physics module should be chosen for following problem?
Classic problem : membrane with attached masses for sound transmission loss
I have chosen the pressure acoustics, membrane and solid module, is this okay?
Mads Herring Jensen
June 27, 2023 COMSOL EmployeeHi Raja, this sounds correct, but when you select the membrane physics it represents a structure with no bending stiffness. In this case you typically need to run the membrane as prestressed to give it some tension. If it is just a model of a thin solid, then you can use the shell physics interface.
Best regards
Mads
Priyanka Suryawanshi
May 18, 2024HI Mads ,
Can you please share the following reference based on which this tutorial is framed.
A. Litvin and H.W. Belliston, “Sound Transmission Loss Through Concrete and
Concrete Masonry Walls,” American Concrete Institute, Journal Proceedings, vol. 45,
pp. 641–646, 1978.
tried downloading from site but its not working it seems!
Mads Herring Jensen
May 21, 2024 COMSOL EmployeeHi Priyanka
Unfortunately, we’re unable to provide you with a PDF copy of that journal article due to licensing restrictions. For information about purchasing this journal article for your own use, please see www. doi.org/10.14359/10976 .
Best regards
Mads