
When thinking about freeze-drying processes, I am reminded of astronaut food like the freeze-dried ice cream I tried as a kid. While this application of freeze-drying is important for preserving food being launched into space, there is also an incredible number of noteworthy applications that are used a little closer to home. Let’s take a look at the freeze-drying process, how it can be simulated, and some of the products and designs that rely on it to function.
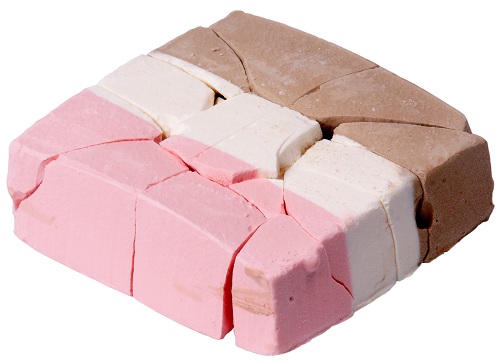
Freeze-dried ice cream. Image attribution: Evan-Amos
The History of Freeze-Drying
Freeze-drying, or lyophilization, is a dehydration process that is often used to preserve a perishable food or material. It is also frequently used as a way to remove water from goods, making them lighter and easier to transport. The first use of freeze-drying as a way to preserve food dates back to 1200 A.D., when people used a precursor of the technique to store meat and produce from their harvests. For instance, they used the high altitudes and low pressures of the Andes Mountain Range as a way to slowly remove water from their frozen crops, effectively freeze-drying the food and allowing it to be stored for years. Hundreds of years later, the freezing-drying process was used again, this time to preserve penicillin and even blood plasma for transport from the U.S. to European medical centers during World War II.
Today, lyophilization is widely recognized as an important technique in many industries. You will find it used, for example, in the pharmaceutical industry for the preservation of antibiotics, in the manufacturing of semiconductor ceramics, and by preservation initiatives, such as in the restoration of water-damaged documents. And of course, you’ll find the process widely used in the food industry, to preserve tasty snacks that can last up to 30 years.
Sublimation and the Freeze-Drying Process
Freeze-drying uses a technique called sublimation, where a frozen liquid passes directly from a frozen state and into a gaseous state. You have probably seen this transformation process at a rock concert, where blocks of solid carbon dioxide, or dry ice, create the “smokey” atmosphere up on stage. This ability for a solid to skip the liquid phase and pass directly into the gaseous phase can be explained by a phase diagram, where a substance’s state under different pressure and temperature conditions is described. As is shown in a phase diagram, at very low pressures and temperatures, a solid can pass directly into the gaseous stage without passing through the intermediary liquid phase.
Freeze-drying consists of two main steps. In the first step, a heat-sensitive substance such as food, blood plasma, or antibiotics is frozen in a vial or chamber. Next, the pressure is lowered in the chamber and enough heat is slowly added to allow the frozen substance, usually water, to sublime. A simulation of this process is shown below, where ice sublimes into vapor while in a vial.
Simulating Sublimation Using a Moving Mesh
When simulating the freeze-drying process, a moving mesh must be used in order to account for the two material phases and the change in shape that occurs as the ice sublimes. This can be modeled according to a heat and mass balance analysis defined at the solid-gas boundary using the Deformed Geometry interface. The moving mesh method allows for a very detailed description of the physics phenomena at the interface between the two phases. The geometry of the model is shown below:
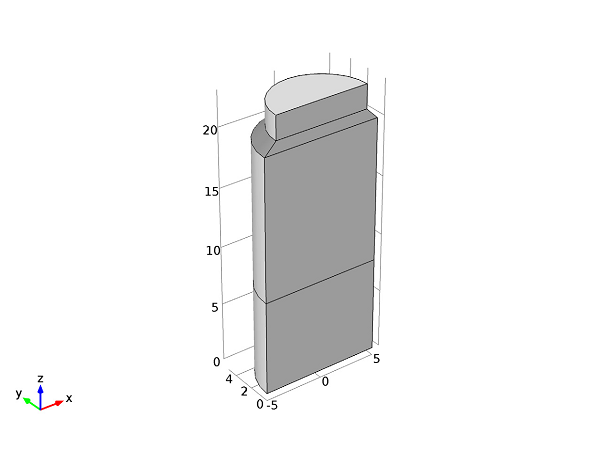
Geometry of the container used in the freeze-drying process.
To make the simulation more interesting, a heater is placed under the vial so that it covers only half of the bottom of the container, producing uneven heating. In the beginning of the simulation (shown below), there is ice on the bottom of the container, while the remaining space in the container is composed of vapor that has been created by sublimation.
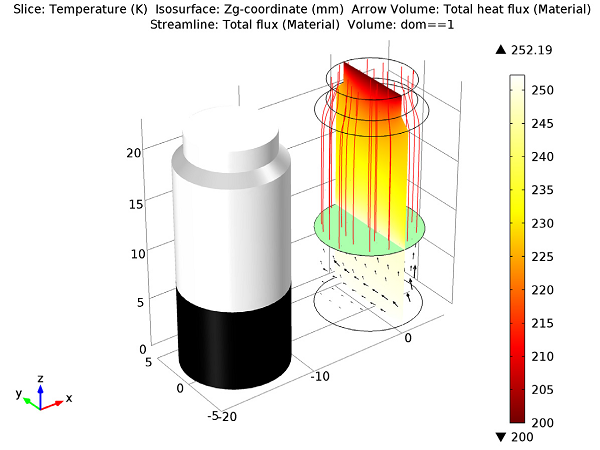
Initial state of the water in the vial.
As the ice continues to sublime, the temperature and flux distribution in the model can be measured. After a period of t = 1800 s, the melting ice has the proportions shown below:
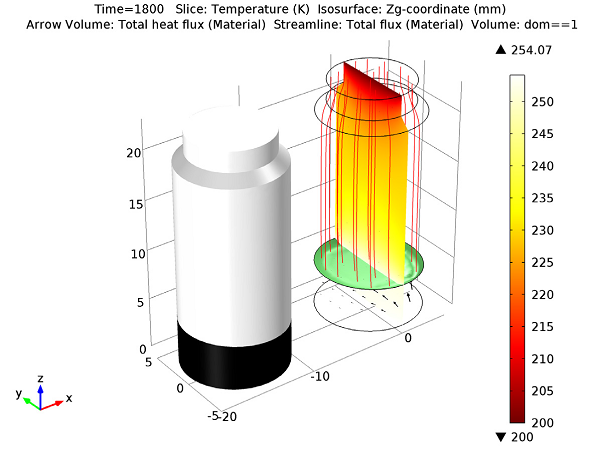
Geometry of the melting front after 30 minutes.
You can see from this visualization that the melting front has a concave curved shape that is higher around the outside edges of the vial wall. Additionally, because the heating is uneven at the bottom of the vial, the interface level is slightly lower, near x > 0. As the ice becomes a vapor, the mass of the solid decreases and therefore the mesh of the solid must change as well. The image below shows the moving mesh at the initial time (left), and after 30 minutes (right). As you can see, the swept mesh has changed to follow the receding freezing front.
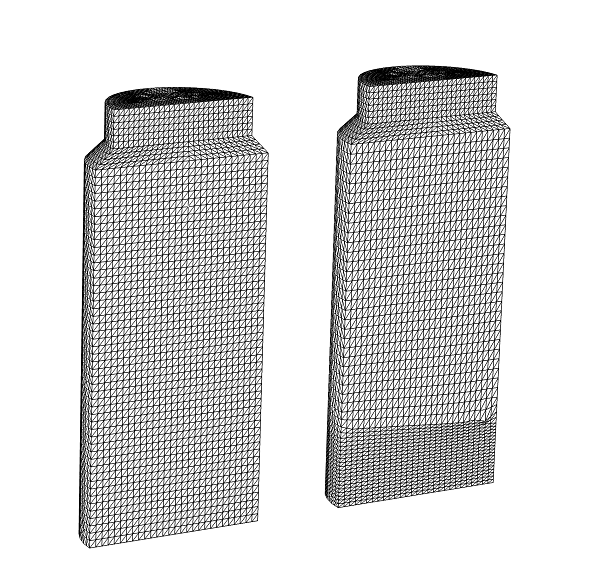
The moving mesh at initial time (left), and after 30 minutes has passed (right).
Further Reading
- Download the model: A Transient Analysis of Freeze-Drying
- Related paper from the COMSOL Conference 2011: Finite Element Modeling of Freezing of Coffee Solution


Comments (2)
Vishwas Nesarikar
August 30, 2015Alexandra, thank you for good example on freeze drying. This example is for ice sublimation. Typically freeze dried solution contain solids which create resistance to vapor flow as the sublimation front travels downward. Could you be able to upload a revised model for freeze drying of solutions with solids where mass transfer of vapor in the dried region is part of the model ? Also, current model deals mainly primary drying. Can you please be able to add secondary drying steps also ?
Fanny Griesmer
August 31, 2015 COMSOL EmployeeHello Vishwas, thank you for reading the blog. Please contact support@comsol.com with your request.